
Development | 07.01.2016
Revisited: Multi-Column Gravity Forms
Over two years ago, I wrote an article describing how I sent about creating a multi-column layout for Gravity Forms. Seeing as how Rocketgenius still hasn’t included a built-in option to achieve this, I recently decided to revisit it.
Gravity Forms, we all love this plugin. It handles all the complexities of form creation, management, submission validation, and entry storage while allowing us focus on more of the fun bits when building a website. However, one of the limitations we’ve found while using this plugin for the better part of four years is the inability to split our forms into multiple columns.
Imagine a scenario where you’re asked to create a form to look like the following mockup:

This is clearly not something Gravity Forms’ CSS-ready classes could handle as the first four fields in the form are all shifted to the left as a group while the message field is shifted right on its own. We’re going to require a system that actually separates the HTML elements so we can control the layout of each group in the form.
The Default Form Structure
Before we can dive too far into adding column splitting to our form, we need to understand how Gravity Forms structures it’s forms’ HTML output. Here’s the default output of the form body from the example above:
<div class="gform_body">
<ul id="gform_fields_2" class="gform_fields top_label form_sublabel_below description_below">
 	<li id="field_2_1" class="gfield field_sublabel_below field_description_below"><label class="gfield_label" for="input_2_1">Your Name</label>
<div class="ginput_container ginput_container_text"><input id="input_2_1" class="medium" tabindex="1" name="input_1" type="text" value="" aria-invalid="false" /></div></li>
 	<li id="field_2_2" class="gfield field_sublabel_below field_description_below"><label class="gfield_label" for="input_2_2">Your Phone Number</label>
<div class="ginput_container ginput_container_text"><input id="input_2_2" class="medium" tabindex="2" name="input_2" type="text" value="" aria-invalid="false" /></div></li>
 	<li id="field_2_3" class="gfield field_sublabel_below field_description_below"><label class="gfield_label" for="input_2_3">Your Email Address</label>
<div class="ginput_container ginput_container_email"><input id="input_2_3" class="medium" tabindex="3" name="input_3" type="email" value="" /></div></li>
 	<li id="field_2_4" class="gfield field_sublabel_below field_description_below"><label class="gfield_label" for="input_2_4">What can we help you with?</label>
<div class="ginput_container ginput_container_select"><select id="input_2_4" class="medium gfield_select" tabindex="4" name="input_4" aria-invalid="false">
<option value="">Select Option...</option>
<option value="Product Quote">Product Quote</option>
<option value="Technical Support">Technical Support</option>
<option value="General Inquiry">General Inquiry</option>
</select></div></li>
 	<li id="field_2_5" class="gfield field_sublabel_below field_description_below"><label class="gfield_label" for="input_2_5">Message</label>
<div class="ginput_container"><textarea id="input_2_5" class="textarea medium" tabindex="5" cols="50" name="input_5" rows="10" aria-invalid="false"></textarea></div></li>
</ul>
</div>
As you can see, fields are output as line items within a single unordered list. Ideally, we’ll want to split that unordered list before the final field so it can be arranged separate from the rest.
Splitting the List of Fields
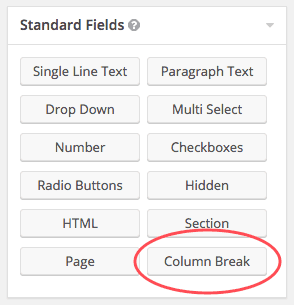
The first step in breaking the list of fields into separate groups is to define where in the list to create the split. To do this, we’ll create a new field that can be added to forms to indicate a column break:
Creating the Column Field Type
In this case, we’re following the development pattern of extending the GF_Field class in order to introduce a new field type to the form editor:
if(!class_exists('GF_Field_Column') && class_exists('GF_Field')) {
class GF_Field_Column extends GF_Field {
public $type = 'column';
public function get_form_editor_field_title() {
return esc_attr__('Column Break', 'gravityforms');
}
public function is_conditional_logic_supported() {
return false;
}
function get_form_editor_field_settings() {
return array(
'column_description',
'css_class_setting'
);
}
public function get_field_input($form, $value = '', $entry = null) {
return '';
}
public function get_field_content($value, $force_frontend_label, $form) {
$is_entry_detail = $this->is_entry_detail();
$is_form_editor = $this->is_form_editor();
$is_admin = $is_entry_detail || $is_form_editor;
if($is_admin) {
$admin_buttons = $this->get_admin_buttons();
return $admin_buttons.'<label class="'gfield_label'">'.$this->get_form_editor_field_title().'</label>{FIELD}
<hr />
';
}
return '';
}
}
}This GF_Field_Column class sets its $type property to 'column' so we can easily identify this field later on. The rest of the methods we’re overriding from the parent class control how the field looks and behaves within the form editor. One thing to note here is the inclusion of the 'column_description' element in the returned field settings array. This will be used later on for the output of the column field’s description in the admin.
Next, we need to actually register the new field so Gravity Forms knows to include it in the editor:
function register_gf_field_column() {
if(!class_exists('GFForms') || !class_exists('GF_Field_Column')) return;
GF_Fields::register(new GF_Field_Column());
}
add_action('init', 'register_gf_field_column', 20);
We’re registering this function on the init hook with a priority of 20 to ensure that Gravity Forms has been properly initialized, if that plugin is activated.
You should now see this new little field type in the form editor:
Adding this field to your form should should insert the controls for the column break element:
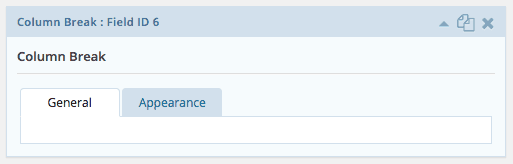
Now, this isn’t the most professional-looking UI as the general tab is completely empty. Let’s add something to it so users don’t get confused:
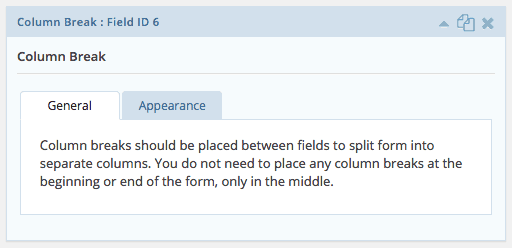
function add_gf_field_column_settings($placement, $form_id) {
if($placement == 0) {
$description = 'Column breaks should be placed between fields to split form into separate columns. You do not need to place any column breaks at the beginning or end of the form, only in the middle.';
echo '
<ul>
 	<li class="column_description field_setting">'.$description.'</li>
</ul>
';
}
}
add_action('gform_field_standard_settings', 'add_gf_field_column_settings', 10, 2);
This function specifies the controls to display for the 'column_description' field setting we defined earlier in our GF_Field_Column class. In this case, all we’re doing is providing a general description at the top of the general settings tab for how this column field type should be used.
Starting a New List of Fields
At this point, now that we’ve inserted the new column field type, our HTML output of the form’s body should look something like this:
<div class="gform_body">
<ul id="gform_fields_2" class="gform_fields top_label form_sublabel_below description_below">
 	<li id="field_2_1" class="gfield field_sublabel_below field_description_below"><label class="gfield_label" for="input_2_1">Your Name</label>
<div class="ginput_container ginput_container_text"><input id="input_2_1" class="medium" tabindex="1" name="input_1" type="text" value="" aria-invalid="false" /></div></li>
 	<li id="field_2_2" class="gfield field_sublabel_below field_description_below"><label class="gfield_label" for="input_2_2">Your Phone Number</label>
<div class="ginput_container ginput_container_text"><input id="input_2_2" class="medium" tabindex="2" name="input_2" type="text" value="" aria-invalid="false" /></div></li>
 	<li id="field_2_3" class="gfield field_sublabel_below field_description_below"><label class="gfield_label" for="input_2_3">Your Email Address</label>
<div class="ginput_container ginput_container_email"><input id="input_2_3" class="medium" tabindex="3" name="input_3" type="email" value="" /></div></li>
 	<li id="field_2_4" class="gfield field_sublabel_below field_description_below"><label class="gfield_label" for="input_2_4">What can we help you with?</label>
<div class="ginput_container ginput_container_select"><select id="input_2_4" class="medium gfield_select" tabindex="4" name="input_4" aria-invalid="false">
<option value="">Select Option...</option>
<option value="Product Quote">Product Quote</option>
<option value="Technical Support">Technical Support</option>
<option value="General Inquiry">General Inquiry</option>
</select></div></li>
 	<li id="field_2_6" class="gfield field_sublabel_below field_description_below"></li>
 	<li id="field_2_5" class="gfield field_sublabel_below field_description_below"><label class="gfield_label" for="input_2_5">Message</label>
<div class="ginput_container"><textarea id="input_2_5" class="textarea medium" tabindex="5" cols="50" name="input_5" rows="10" aria-invalid="false"></textarea></div></li>
</ul>
</div>
Not a lot has changed since we started with the exception of the empty list item in the location we specified in the form editor. We can now target our new field’s type to replace the output of this element with a closing unordered list tag as well as a new opening one to begin a new list of fields within the form body. This is achieved by adding a filter to the field container:
function filter_gf_field_column_container($field_container, $field, $form, $css_class, $style, $field_content) {
if(IS_ADMIN) return $field_container;
if($field['type'] == 'column') {
$column_index = 2;
foreach($form['fields'] as $form_field) {
if($form_field['id'] == $field['id']) break;
if($form_field['type'] == 'column') $column_index++;
}
return '
<ul class="'.GFCommon::get_ul_classes($form).' column column_'.$column_index.' '.$field['cssClass'].'">
<li style="list-style-type: none;">
<ul class="'.GFCommon::get_ul_classes($form).' column column_'.$column_index.' '.$field['cssClass'].'">';</ul>
</li>
</ul>
<ul class="'.GFCommon::get_ul_classes($form).' column column_'.$column_index.' '.$field['cssClass'].'">
<li style="list-style-type: none;">
<ul class="'.GFCommon::get_ul_classes($form).' column column_'.$column_index.' '.$field['cssClass'].'">}</ul>
</li>
</ul>
<ul class="'.GFCommon::get_ul_classes($form).' column column_'.$column_index.' '.$field['cssClass'].'">
<li style="list-style-type: none;">
<ul class="'.GFCommon::get_ul_classes($form).' column column_'.$column_index.' '.$field['cssClass'].'">return $field_container;</ul>
</li>
</ul>
<ul class="'.GFCommon::get_ul_classes($form).' column column_'.$column_index.' '.$field['cssClass'].'">
<li style="list-style-type: none;">
<ul class="'.GFCommon::get_ul_classes($form).' column column_'.$column_index.' '.$field['cssClass'].'">}</ul>
</li>
</ul>
<ul class="'.GFCommon::get_ul_classes($form).' column column_'.$column_index.' '.$field['cssClass'].'">
<li style="list-style-type: none;">
<ul class="'.GFCommon::get_ul_classes($form).' column column_'.$column_index.' '.$field['cssClass'].'">add_filter('gform_field_container', 'filter_gf_field_column_container', 10, 6);</ul>
</li>
</ul>
<ul class="'.GFCommon::get_ul_classes($form).' column column_'.$column_index.' '.$field['cssClass'].'">This closes the previous unordered list and starts a new one with a similar configuration to the original, effectively splitting the groups of fields. We’re also adding classes to the new list to specify this is a column and which column it is in relation to the other column fields found in the form’s configuration.
The output should look something like this:
<div class="gform_body">
<ul id="gform_fields_2" class="gform_fields top_label form_sublabel_below description_below">
 	<li id="field_2_1" class="gfield field_sublabel_below field_description_below"><label class="gfield_label" for="input_2_1">Your Name</label>
<div class="ginput_container ginput_container_text"><input id="input_2_1" class="medium" tabindex="1" name="input_1" type="text" value="" aria-invalid="false" /></div></li>
 	<li id="field_2_2" class="gfield field_sublabel_below field_description_below"><label class="gfield_label" for="input_2_2">Your Phone Number</label>
<div class="ginput_container ginput_container_text"><input id="input_2_2" class="medium" tabindex="2" name="input_2" type="text" value="" aria-invalid="false" /></div></li>
 	<li id="field_2_3" class="gfield field_sublabel_below field_description_below"><label class="gfield_label" for="input_2_3">Your Email Address</label>
<div class="ginput_container ginput_container_email"><input id="input_2_3" class="medium" tabindex="3" name="input_3" type="email" value="" /></div></li>
 	<li id="field_2_4" class="gfield field_sublabel_below field_description_below"><label class="gfield_label" for="input_2_4">What can we help you with?</label>
<div class="ginput_container ginput_container_select"><select id="input_2_4" class="medium gfield_select" tabindex="4" name="input_4" aria-invalid="false">
<option value="">Select Option...</option>
<option value="Product Quote">Product Quote</option>
<option value="Technical Support">Technical Support</option>
<option value="General Inquiry">General Inquiry</option>
</select></div></li>
</ul>
<ul class="gform_fields top_label form_sublabel_below description_below column column_2 ">
 	<li id="field_2_5" class="gfield field_sublabel_below field_description_below"><label class="gfield_label" for="input_2_5">Message</label>
<div class="ginput_container"><textarea id="input_2_5" class="textarea medium" tabindex="5" cols="50" name="input_5" rows="10" aria-invalid="false"></textarea></div></li>
</ul>
</div>
We did it!
Now that we’ve added column splitting to the form’s fields, it may be useful to add some additional CSS classes to the form wrapper to aid in styling the form’s layout:
function filter_gf_multi_column_pre_render($form, $ajax, $field_values) {
$column_count = 0;
$prev_page_field = null;
foreach($form['fields'] as $field) {
if($field['type'] == 'column') {
$column_count++;
} else if($field['type'] == 'page') {
if($column_count > 0 && empty($prev_page_field)) {
$form['firstPageCssClass'] = trim((isset($field['firstPageCssClass']) ? $field['firstPageCssClass'] : '').' gform_page_multi_column gform_page_column_count_'.($column_count + 1));
} else if($column_count > 0) {
$prev_page_field['cssClass'] = trim((isset($prev_page_field['cssClass']) ? $prev_page_field['cssClass'] : '').' gform_page_multi_column gform_page_column_count_'.($column_count + 1));
}
$prev_page_field = $field;
$column_count = 0;
}
}
if($column_count > 0 && empty($prev_page_field)) {
$form['cssClass'] = trim((isset($form['cssClass']) ? $form['cssClass'] : '').' gform_multi_column gform_column_count_'.($column_count + 1));
} else if($column_count > 0) {
$prev_page_field['cssClass'] = trim((isset($prev_page_field['cssClass']) ? $prev_page_field['cssClass'] : '').' gform_page_multi_column gform_page_column_count_'.($column_count + 1));
}
return $form;
}
add_filter('gform_pre_render', 'filter_gf_multi_column_pre_render', 10, 3);
This function loops through all the form’s fields and tracks how many column field types it finds. If there are any included, CSS classes are automatically added to the form wrapper (or form page wrapper if applicable) to convey this should be styled as a multi-column layout as well as indicate the number of columns it contains:
<div id="gform_wrapper_2" class="gform_wrapper gform_multi_column_wrapper gform_column_count_2_wrapper"><form id="gform_2" class="gform_multi_column gform_column_count_2" action="/" enctype="multipart/form-data" method="post">...Styling the Form Columns
All that should be left is just defining how the separate columns should be laid out. Typically, we’ll want to display each column side by side. We’ll just need to include a few CSS definitions to accomplish this:
.gform_multi_column_wrapper .gform_body,
.gform_page_multi_column .gform_page_fields {
margin-left: -15px;
margin-right: -15px;
}
.gform_multi_column_wrapper .gform_body:after,
.gform_page_multi_column .gform_page_fields:after {
content: ' ';
display: table;
clear: both;
}
.gform_multi_column_wrapper ul.gform_fields,
.gform_page_multi_column ul.gform_fields {
float: left;
width: 100%;
padding-left: 15px;
padding-right: 15px;
}
@media (min-width: 768px) {
.gform_column_count_2_wrapper ul.gform_fields,
.gform_page_column_count_2 ul.gform_fields {
width: 50%;
}
.gform_column_count_3_wrapper ul.gform_fields,
.gform_page_column_count_3 ul.gform_fields {
width: 33.333333%;
}
.gform_column_count_4_wrapper ul.gform_fields,
.gform_page_column_count_4 ul.gform_fields {
width: 25%;
}
}
If the CSS classes we’re automatically including in multi-column forms are present, the lists of fields are evenly distributed horizontally for viewports 768px wide and up. These CSS definitions can be further customized to your liking, but the above rules should provide the basis of a multi-column form layout.
For a complete set of the code outlined here, you may download a standalone WordPress plugin to install that adds the described multi-column layout feature to your site:
[btn href=”https://www.jordancrown.com/wp-content/uploads/2016/07/gravityforms-multi-column.1.1.0.zip” target=”_blank” class=”primary arrow lg”]Download Plugin[/btn]